






Choosing a Bath Waste Push Button is a small decision with daily consequences. The right one should suit the waste mechanism, fit the tub, and feel comfortable under a wet fingertip. A shiny finish alone proves little. Check the product specifications before buying, especially the required cable, thread, or mounting arrangement. Compatibility matters.
Mike Holmes, a Canadian contractor and home-renovation expert, is known for the motto, “Make It Right.” Applied here, that means choosing a button that works reliably, not merely one that looks attractive in a product photo. Compare finishes with your taps and overflow cover. Chrome can show water spots; brushed finishes may hide them better. Check whether the surface resists corrosion and whether the button can be removed for cleaning. A stiff or loose action can become annoying fast.
There are details people overlook. Measure the existing opening, note how the waste is operated, and confirm the replacement suits that system. Push-button designs may connect to different mechanisms, so appearance cannot confirm a match. If the mechanism is concealed or the product instructions are unclear, ask the supplier or a qualified installer to verify compatibility. That extra check may prevent a return—or a frustrating installation.
A good choice feels simple. It should press smoothly, return cleanly, and sit neatly against the tub. Still, product descriptions do not always show how a button feels after months of use. Read the warranty and care guidance, and treat unusually vague specifications as a reason to pause.
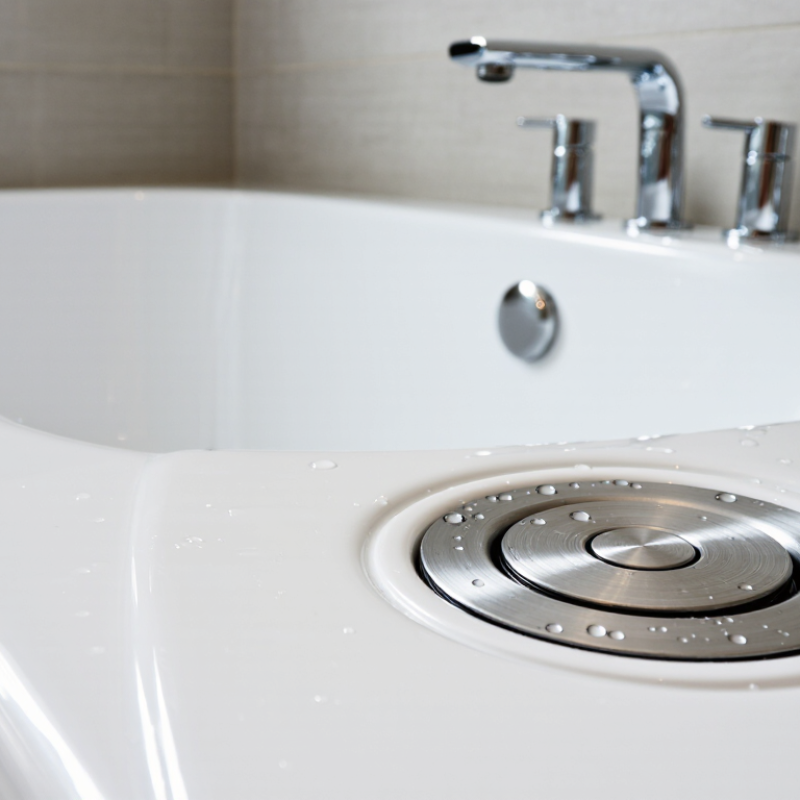
Before choosing a bath waste push button, identify how your waste is operated. Look at the overflow plate and drain. A button on the overflow may control a plug through a cable or linkage, while a click-clack waste is pressed directly at the drain. They are not always interchangeable. Check carefully.
If the overflow button operates a cable, inspect the existing mechanism before ordering. Note the button’s diameter, fixing method, and how it connects to the cable. A replacement may look identical but have a different thread or spindle length. If possible, compare it with the removed part and measure across the widest point. Small differences matter.
For a direct push-button waste, check the drain fitting’s size and whether its cap screws on or clips into place. Also note the finish, such as chrome or brushed metal, so the new part sits naturally beside the tap. Unsure which system you have? Press the button and watch the plug, or gently remove the overflow cover if it is designed to come off. Don’t force it. Older fittings can be awkward, and I’ve found that guessing from a photo alone is often unreliable. If the mechanism is hidden or corroded, a plumber can identify the fitting before you buy.
A bath waste push button must match the drain and overflow mechanism, not just the visible cover. Compatibility starts with the mechanism type. Some buttons operate a cable that lifts a plug; others connect to a linkage or a spring-loaded waste. These parts can look similar but require different connections and button travel. Check the existing setup before ordering.
Measure the button diameter and note how it attaches to the overflow plate. Then inspect the connection behind it: look for a cable end, threaded spindle, or linkage, and compare its shape and length with the replacement specifications. Small differences matter. A button that sits flush but cannot move the mechanism far enough may leave the plug partly open or make it hard to close.
If details are unclear, remove the old button carefully and take a clear photo beside a ruler. Keep any seals and spacers in their original order. Test the replacement with the tub empty, pressing it several times to confirm smooth movement and a secure seal. Don’t overtighten plastic fittings; they can crack. A universal fit is not always a reliable fit, and checking dimensions twice can save a second repair.
Choosing a bath waste push button starts with the material. Solid brass feels substantial and resists everyday wear, though it usually costs more. Stainless steel offers a practical balance of strength and easy cleaning. Molded plastic is lightweight and often more affordable, but can feel less solid under frequent use. That difference matters.
Finishes change both appearance and maintenance. Brushed metal softens water spots and fingerprints, while polished chrome reflects light but may need frequent wiping. Matte black creates contrast against pale tubs; check care instructions, since abrasive cleaners can mark some coatings. A finish sample can look different beside your actual taps and tiles.
Button design affects comfort, too. A raised, rounded button is easier to find with wet fingers, while a low-profile style gives the tub a cleaner look. Small detail, big difference. Check the button’s diameter and waste-mechanism compatibility before buying; attractive designs are not always interchangeable. It is easy to focus on appearance and overlook the feel of the press. If possible, test the action: it should move smoothly without wobbling or requiring excessive force.
Before choosing a bath waste push button, check how the existing drain is installed. Look beneath the bath, if access is available, and note whether the button operates a cable, rod, or simple pop-up mechanism. These systems are not always interchangeable. Measure the waste opening and check the overflow arrangement, too. A button may look like a match but still fail to connect correctly. Take clear photos of the old assembly and its connections. They can help a plumber or supplier identify the fitting. It is easy to overlook the overflow detail.
Replacement parts deserve equal attention. Ask whether the button, connecting cable or rod, seals, and fixing clips can be bought separately. If one small component wears out, replacing the whole waste assembly may mean extra work and cost. Check the product instructions or parts diagram before buying, and confirm that the listed components match your installation. Small parts matter. Keep the old button until the replacement is fitted and tested; dimensions can differ slightly, even when two pieces appear similar. I would not rely on appearance alone. A little uncertainty is normal with older baths, so verify measurements and access space before ordering.
| Selection Factor | What to Check | Why It Matters for Installation | Replacement-Part Considerations |
|---|---|---|---|
| Waste mechanism | Identify whether the existing waste uses a push-button click-clack mechanism, a cable-operated pop-up, or another linkage system. | Different mechanisms use different internal parts and operating arrangements; a button that looks similar may not fit the existing waste body. | Check whether the button, spring, plug, and waste body are sold separately or only as a complete assembly. |
| Drain outlet size | Measure the basin’s drain opening and compare it with the waste’s stated outlet and fitting dimensions. | Waste sizes and connection standards can vary. Confirm the product specification rather than relying on appearance alone. | Record the existing waste’s measurements before ordering, especially when replacing only the plug or mechanism. |
| Overflow arrangement | Check whether the basin has an overflow opening and whether the waste is designed for an overflow or for a basin without one. | An overflow-compatible waste includes a route for water from the basin overflow. The wrong configuration may not connect properly. | Match the replacement waste to the basin’s overflow arrangement; do not assume an overflow version can be adapted to every basin. |
| Basin thickness and clearance | Measure the basin thickness around the drain and check the available space beneath the basin. | The threaded section must be long enough to secure the waste through the basin, and the assembled waste must clear the trap and surrounding fittings. | Look for the manufacturer’s stated fitting range or dimensions when replacing the complete waste assembly. |
| Trap and pipe connection | Check the outlet direction, connection diameter, and the type of trap or waste pipe currently installed. | Compatible connections help avoid misalignment, extra adapters, or changes to the existing pipework. | Confirm that seals and connection parts are included, and verify the connection dimensions before buying a replacement. |
| Button location and operation | Check whether the button is mounted on the plug, on the waste fitting, or operated by a separate control. | The operating method affects access, installation sequence, and whether the button can be comfortably reached and pressed. | For a button-only replacement, verify its thread, shape, and compatibility with the existing mechanism. |
| Installation access | Assess access beneath the basin and whether the old waste can be reached and removed with the available tools. | Restricted access can make tightening, cleaning mating surfaces, and positioning seals more difficult. | Before removing the old unit, check whether the intended replacement requires access to parts that are difficult to reach. |
| Seals and leak checks | Review the supplied gasket arrangement and follow the installation instructions for the basin and waste. | Correctly positioned seals and secure connections help prevent leaks; overtightening can damage fittings or seals. | Check whether replacement seals are available individually and whether the existing seals should be replaced during installation. |
| Parts availability | Look for clear part numbers, a parts diagram, and written compatibility information for the waste assembly. | Identifiable components make it easier to confirm that a replacement part matches the installed mechanism. | Prefer products with documented availability for common service items such as the button, plug, spring, seals, and fixing components. |
| Final compatibility check | Compare the basin type, drain measurements, overflow configuration, mechanism, and pipe connection with the product specification. | Checking all relevant details before installation reduces the risk of ordering a fitting that cannot be installed as intended. | Keep the product instructions and measurements for future maintenance or replacement-part searches. |
Choosing a bath waste push button is not only about matching the taps. Check that it fits your existing waste mechanism, including the connection type and mounting dimensions. A beautiful button that does not operate smoothly is a poor bargain. Small detail. Big difference.
For frequent use, look for a sturdy body and a mechanism that moves cleanly without sticking. Stainless steel or brass can offer good durability, while well-made plastic may suit a tighter budget. Material alone does not guarantee quality. Check how firmly the button is assembled and whether replacement parts are available. A polished finish may look impressive in a showroom but show water spots at home; it is easy to forget that when comparing samples. Choose a finish that works with your bathroom and is simple to wipe clean. Mild cleaning products are usually gentler, but follow the care guidance supplied with the fitting. Spending a little more can make sense if it improves fit and serviceability, though the highest price is not automatically the best choice.
Compare common button materials for durability, corrosion resistance, and budget-friendliness. Higher scores indicate a more favorable choice for that consideration.
Scores are an indicative comparison of common material characteristics, not laboratory test results. Actual performance depends on material grade, finish, product construction, and installation.
No account yet?
Create an Account